
Let’s see how to install, configure and use the Trust Wallet, compatible with more than 50 blockchains and more than 1 million different cryptocurrencies. In a second step, we will see how to interact with the different protocols of the application as well as the procedure to acquire crypto-assets.
Introduction to Trust Wallet
Trust Wallet is a non-custodial digital wallet, which aggregates over 1 million different tokens and cryptocurrencies through interoperability across more than 50 different blockchains. It has been owned by Binance since the year 2018.
The app is fully open source and its code is available on the GitHub platform, providing full transparency and additional proof of security for your funds.
The wallet directly integrates many tools such as viewing non-fungible tokens (NFTs), purchasing cryptocurrencies by credit card, swapping options, and it also allows you to interact with different decentralised finance protocols (DeFi) from a dedicated tab.
It is also possible to import external wallets such as MetaMask, Algorand’s wallet, Near’s wallet or Elrond’s wallet for example. This can be combined with a very useful Trust Wallet feature that allows you to be notified when a transaction is made from your different digital wallets.
Install and configure Trust Wallet
For the moment, Trust Wallet is only available in mobile version. As such, you will find it available for download on the App Store and Google Play
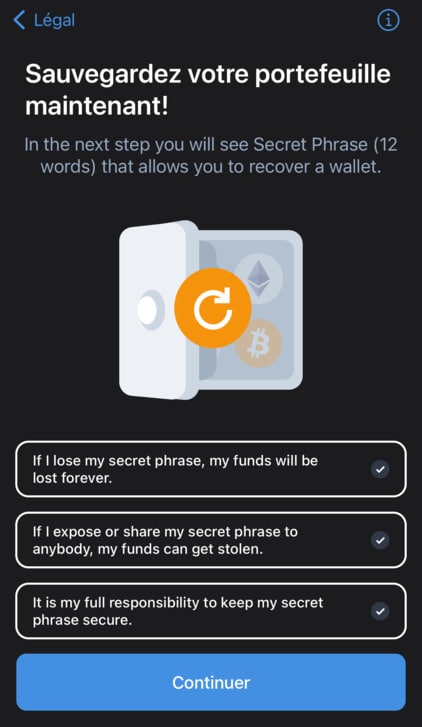
Once you have downloaded the application, launch it and press “Create a new wallet” and then you will have to accept the terms of use and the privacy policy.
On the next screen, Trust Wallet tells you to keep your seed phrase in a safe place. This is a sequence of 12 words that you will use if you lose your password or if you want to import your wallet to a new device. Make sure you keep it on at least 2 different media.
Copy your seed sentence and put the words in the right order on the next screen. Once the process is complete, your portfolio is ready.
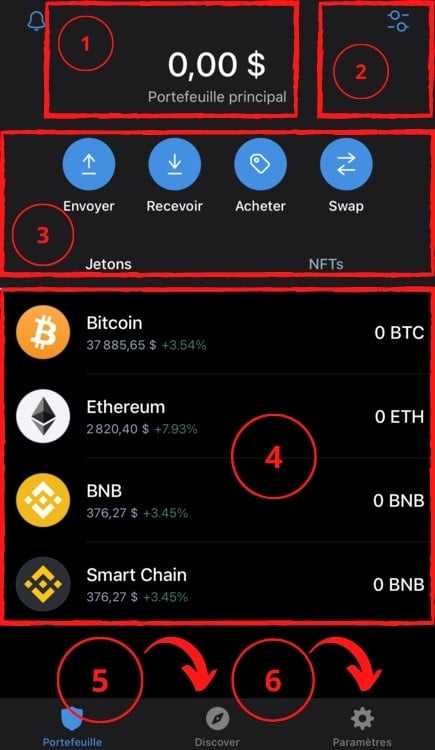
Let’s take a quick look at the home screen:
- Portfolio balance ;
- List of tokens you can display on the home screen (4);
- A single tab to transfer, receive, buy and swap your different tokens;
- Current cryptocurrency price and your relative balance;
- All the DeFi tools in the app, including staking, lending options and different protocols like Curve, Uniswap, Aave or 1inch;
- Application settings and preferences. Here you can find an interesting option to receive notifications when important price changes of your favorite cryptocurrencies occur, and you can also find the possibility to link Trust Wallet to WalletConnect.
Trust Wallet has some very interesting options that you have to add manually. To access them, go to the “Settings” tab.
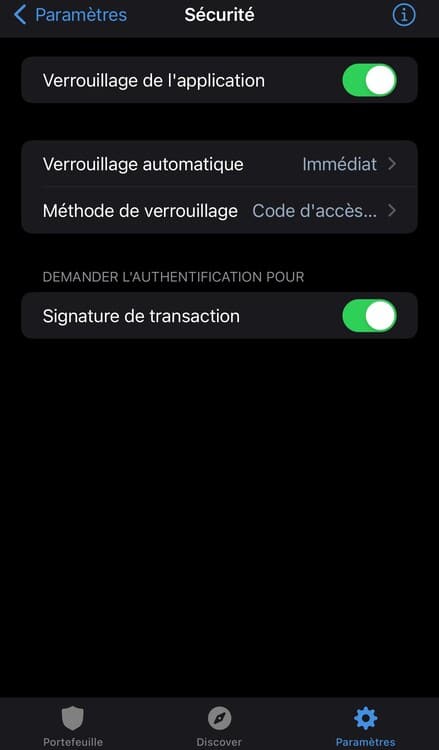
First, let’s see how to make the application as secure as possible. Go to the “Security” tab and activate the “Application lock” and “Transaction signature” functions.
In this way, you will have to create a 6-digit code that will be required each time you open Trust Wallet, but also to confirm all your transactions.
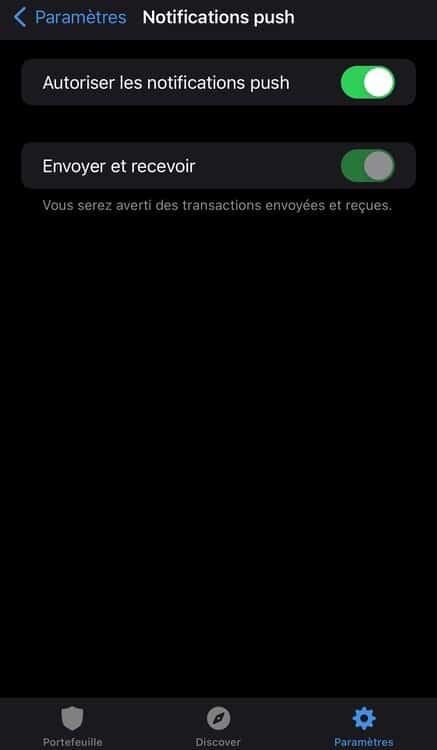
Trust Wallet also offers a handy tool to notify you in real time on your smartphone when a transaction is made on your wallets.
Go to the “Push Notifications” tab and activate “Allow push notifications” and then “Send and receive”.
This way, you can optimize the security of your wallet and you will be directly informed if someone tries to steal from you.
Note: Notifications are not exclusively dependent on Trust Wallet. For example, if you link your MetaMask wallet to Trust Wallet using your seed phrase, then you will also be notified as soon as a transaction is carried out on the corresponding MetaMask wallet.
Import and export cryptocurrencies with Trust Wallet
As Trust Wallet has interoperability between a large number of blockchains (currently over 50), the application will provide you with a different address for each network. For example, you will have an address for blockchains compatible with the Ethereum Virtual Machine (EVM), another for the Avalanche C-Chain (AVAX), another for Terra (LUNA), etc.
Import tokens
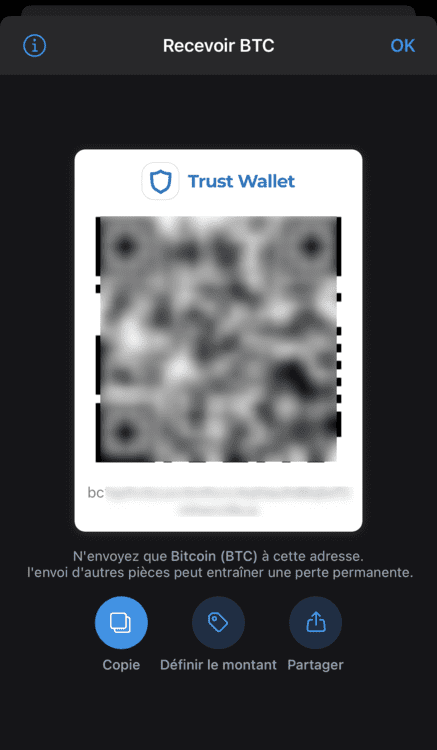
To import tokens into Trust Wallet, select ‘Receive’ from the home screen, then choose the token you want from the list.
You will then see the screen below. In our case, we have chosen to buy bitcoin. Note that your address is displayed in two ways: a QR code for third-party applications that can read them, and a classic address starting with “bc”. This is the address you will need to copy when you want to import different tokens into Trust Wallet.
Export tokens
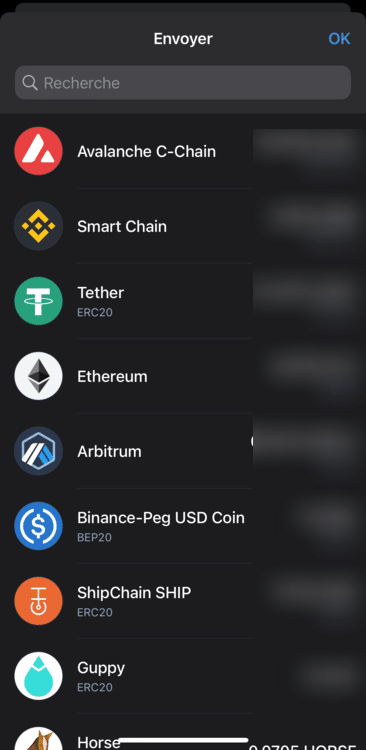
To transfer tokens, press “Send” from the home screen. The list of your tokens will appear in ascending order according to the amount you have for each. Press the one you want to transfer.
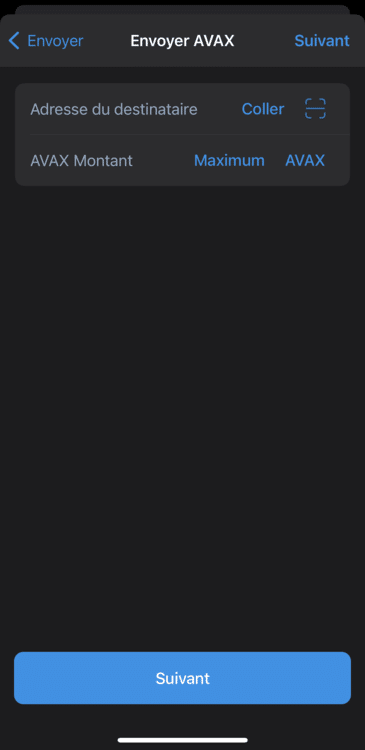
On the next screen, enter the recipient’s address or scan the QR corresponding to that address, then select the amount you wish to send.
Important note: make sure you select the address of the corresponding network. For example, if you want to send AVAX to a third party, make sure you enter their C-Chain address.
All you have to do is complete the transaction, and your funds should arrive shortly in the corresponding portfolio.
Buy cryptocurrencies with Trust Wallet
Directly from the app
It is possible to buy tokens directly from the app by paying with a credit card, but be careful, the transaction fees are much higher than via an exchange platform.
To do this, simply tap on “Buy” on the home screen and then select the cryptocurrency of your choice. Specify the amount you want to spend and then optionally choose your preferred payment intermediary, but Trust Wallet automatically selects the cheapest by default.
With most payment intermediaries, a new window will automatically open on your web browser to complete the transaction.
Depending on the intermediary and the cryptocurrency you choose, the time to receive the funds on Trust Wallet may vary, but overall it’s pretty fast.
From a third party platform
To reduce transaction costs, it is also possible to import funds from exchange platforms such as FTX, Kraken, Binance, Kucoin and others.
To keep things as simple as possible, we will use the example of the Binance platform, which is extremely easy to use even for novices.
To support us, you can use the link below to buy BNB tokens on Binance. This link will also get you a welcome offer on the platform.
We will see how to buy BNB tokens from Binance and then we will see how to send them to our Trust Wallet.
First, copy your address from Trust Wallet by selecting “Receive” and then “Smart Chain”. Your address should start with “0x…”.
Then go to the Binance application.
If you don’t have a BNB, you can buy one directly from the dedicated tab in the bottom bar of the application. If you are completely new to Binance, please read our dedicated tutorial on the platform.
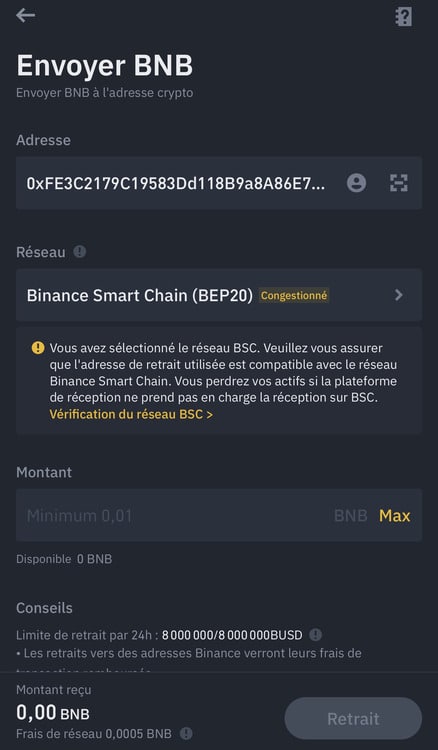
Once you have the NBBs, go to your Binance portfolio and search for “NBBs”. Then select “Withdraw”.
You will notice that by pasting your address, Binance will directly select the BEP20 network.
Make sure you have selected the Binance Smart Chain network on Trust Wallet.
Then choose the amount of your choice and validate the transaction.
Your tokens should arrive in your Trust Wallet more or less quickly depending on the state of the Binance Smart Chain network. The process will be the same for all tokens you withdraw from Binance.
Interact with DeFi applications through Trust Wallet
Trust Wallet offers the possibility to interact with many protocols, whether it is for staking to make your investments grow, lending or to take advantage of DeFi applications.
To use these protocols, you will have to go to the “Discover” tab located on the bottom bar of the application.
In this example, we will use the Uniswap exchange. Select it from the “DeFi” list and wait for your browser to load the page. Connect your Trust Wallet by choosing “WalletConnect” and then selecting “Trust wallet”.
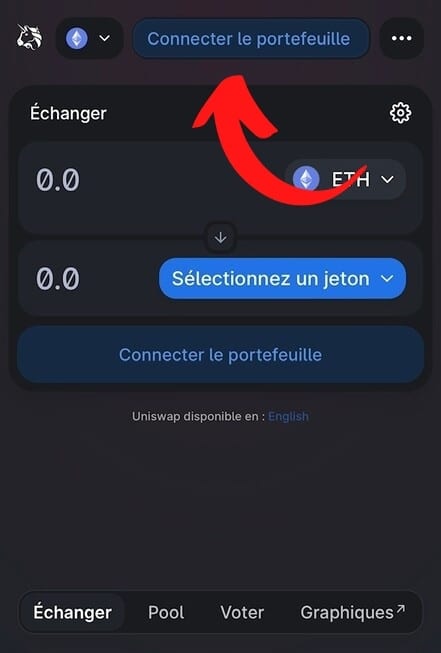
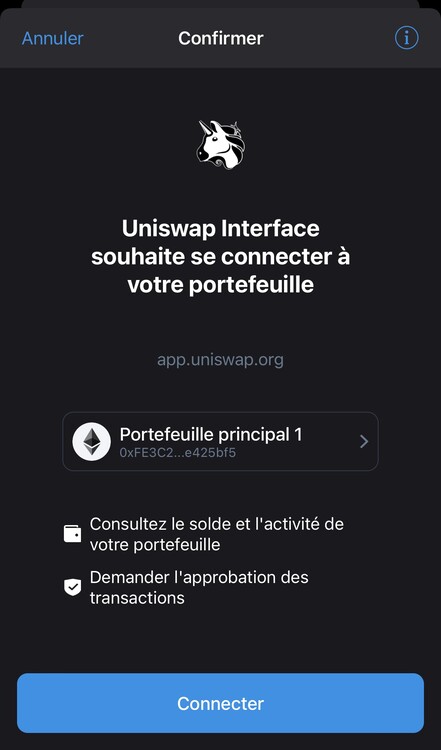
Then give the necessary rights so that Uniswap can interact with Trust Wallet by confirming the connection.
You can now take advantage of the swap from the “Swap” tab, add liquidity to pools or participate in governance votes with UNI tokens.
This is the process for Uniswap but the procedure will always be similar for the other protocols.
So much for this guide to creating and using Trust Wallet. We hope that it has met all your expectations, and if you wish, you can also continue reading through our various guides.