How to install and configure the Frame wallet, a serious competitor to MetaMask? Based on the Ethereum network (ETH) and compatible with many other blockchains, discover the tools Frame offers and how to use this wallet to interact with different protocols.
Introduction to Frame
Frame is a digital wallet based on the Ethereum blockchain (ETH), and is thus a direct competitor to MetaMask.
Unlike most wallets, it must first be downloaded as a desktop application before it can be used as a browser extension. This is an additional safeguard for your funds as your wallet is not directly exposed to the potential risks of a browser.
Note that it is possible to have only the desktop version, but then you will only be able to use it to store your funds, the browser extension is needed to interact with the decentralised applications (DApps).
Although still in beta version, Frame has many assets and allows a very fluid navigation from one address to another. It may seem a bit daunting and technical at first, but don’t worry, we’ll explore it all together.
Requirements for using Frame
Currently, Frame is usable with the protocols available on the Ethereum blockchain and Ethereum Virtual Machine (EVM) compatible blockchains. It also allows you to receive tokens and view your collections of non-fungible tokens (NFTs).
You can find the different blockchains compatible with Frame via the list of EVM networks on Chainlist.
Frame may not always be listed as a wallet available with some protocols, but it has a handy option to pass it off as a MetaMask wallet, so its compatibility is about the same.
Install and configure Frame wallet
Overview of the Frame wallet
To be able to take advantage of the full functionality of Frame, we’ll install it as a desktop application and then add it to our browser.
First, go to the dedicated download page to install the application on the media of your choice. Frame is currently available on Windows, macOS and Linux.
Here is what you should see on the first launch:
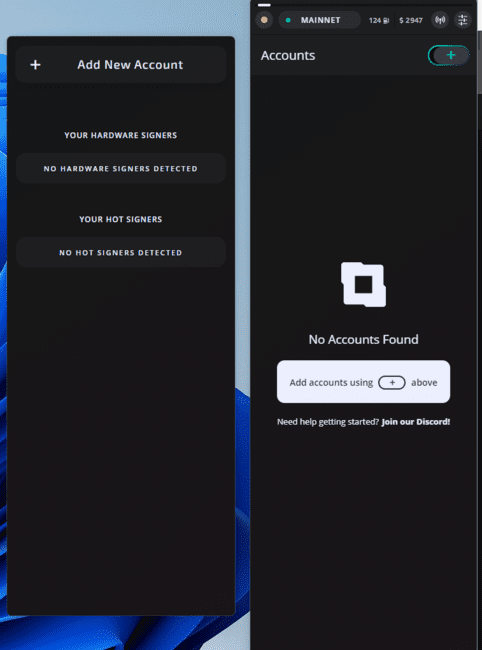
On the left hand side you will find the place where you can add your different portfolios, but let’s first focus on the right hand side, this will be your main navigation screen when using Frame.
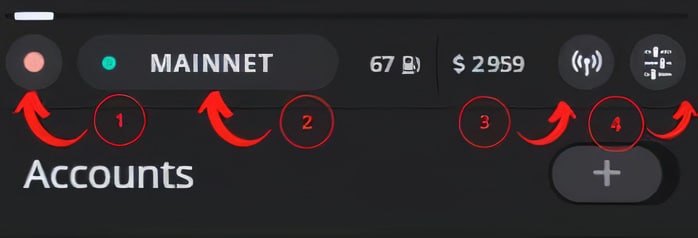
Let’s look at the layout of the different tools:
- Activity Status: If the indicator is red, it means that none of your accounts are active. To activate it and turn it green, you need to unlock one of your registered addresses or connect a hardware wallet to the application;
- Current blockchain and connection status to it: you will be connected to the Ethereum network by default. After adding different networks from tab 3, this is where you can switch from one blockchain to another. A green indicator means that the connection is operational, and a red one indicates on the contrary that Frame has difficulties to connect;
- Choosing the networks you want to use (Polygon, xDai, Arbitrum etc.): this is where you can add or remove the EVM blockchains of your choice;
- Application settings: here you can add shortcuts, change the visual style of the application, set up your hardwares, reset Frame, and other technical options.
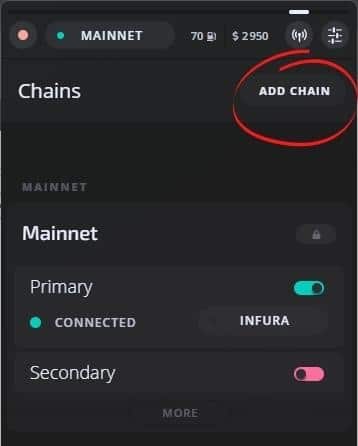
It is also possible to add a network manually by clicking on “Add Chain” at the top right.
Let’s go to the Chainlist site and see how to add the NBB Chain to Frame.
In the search bar of the site, type “BNB Chain mainnet” and click on “Connect wallet”.
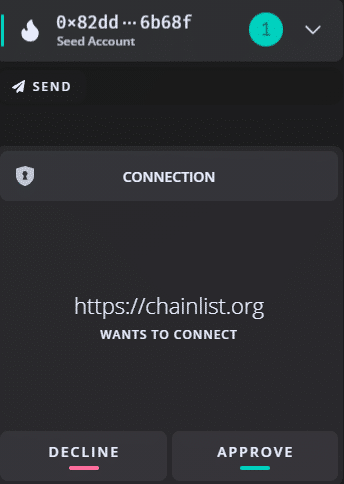
Here you will need to give Chainlist permission to access your wallet.
In Frame, click on the address of your choice and click on ‘Approve’.
Then, on Chainlist, click on “Add to MetaMask” (yes, that’s normal).
Frame will open with the NBB Chain information:
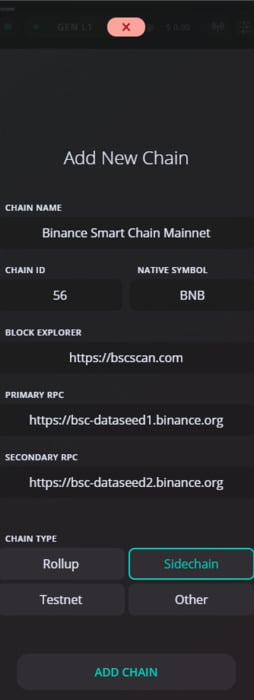
You just have to click on “Add Chain” and the NBB Chain will now be in the list of your networks.
In order to keep the list of networks well organised, make sure you select the type of network you are dealing with: Rollup, Sidechain, Testnet or Other.
The different networks added will be visible in this list and also at the top of the screen (tab n°2) so that you can access them in 2 clicks :
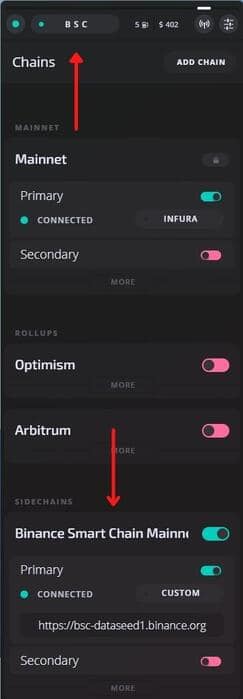
Import a portfolio on Frame
Frame currently supports two types of wallets: hardware wallets like Ledger or Trezor, and wallets hosted on networks.
Let’s see how to add a wallet with a seed phrase. You can for example import your MetaMask wallet with this method.
Note: At the time of writing (February 2022), the Frame website states that the functionality to create a wallet directly from the application is in the works and should be available soon.
To do this, click on the “+” to the right of “Accounts”. Then click on “Add New Account” on the left hand tab.

Then select “Seed Phrase”.
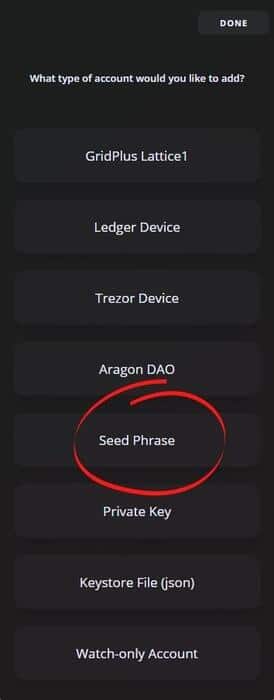
After entering your seed phrase, choose a password longer than 12 characters to secure access to it from Frame.
Frame will then offer you a list of addresses to add in the main interface. If you wish to remove them later, simply click on “+” and deselect the address of your choice.
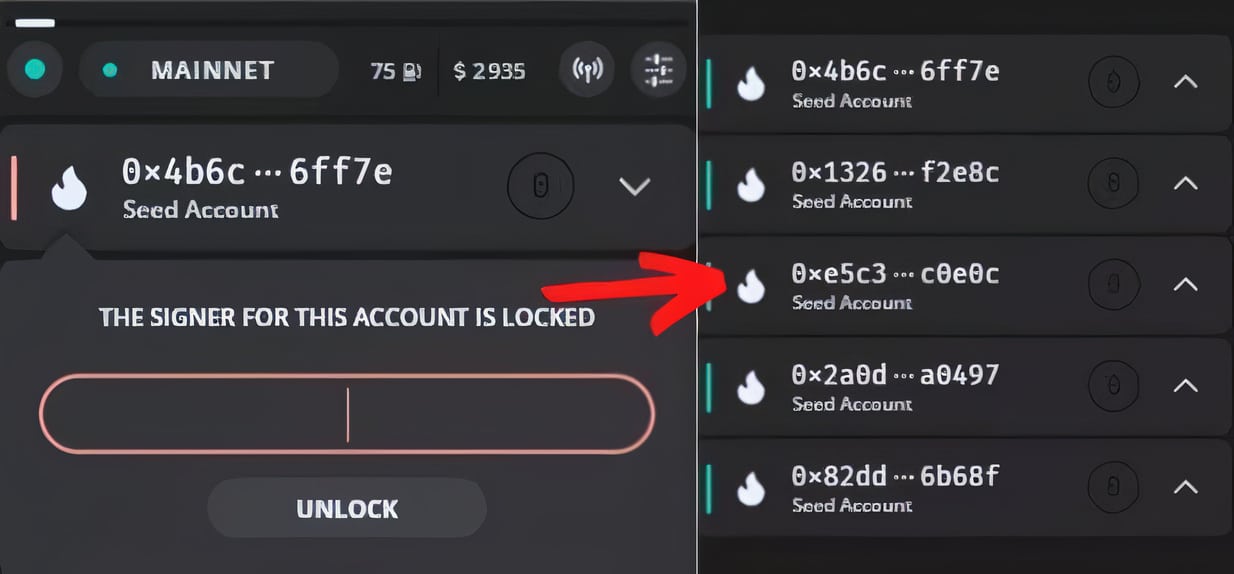
Inactive addresses will have a red border, this can happen if your main account or the address in question is locked.
Addresses will always be locked by default when you first add them. Simply enter the relative password to unlock access, which will turn the indicator green.
Send tokens to Frame
To buy or send tokens on Frame, you can go through FTX, Kraken, KuCoin, Huobi Global or any platform of your choice, as long as you can choose Ethereum or EVM compatible tokens.
To support us, you can use the link below to buy BNB tokens on Binance. This link will also get you a welcome offer on the platform.
We will see how to buy BNB tokens on Binance and then we will see how to send them to our Frame wallet.
First, copy your address from Frame to the application by simply clicking on it:
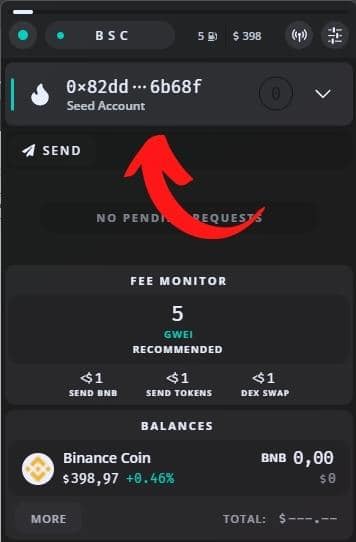
Then go to the Binance website.
If you don’t have a BNB, you can buy them directly from the “Buy Cryptos” tab. If you are completely new to Binance, feel free to read our tutorial dedicated to the platform.
Once you have the BNB, go to your Binance wallet and search for “BNB”. Then select “Withdrawal”.
You will notice that by pasting your address, Binance will directly select the BEP-20 network.
Please make sure that you have chosen the NBB Chain on Frame.
Then choose the amount of your choice and validate the transaction.
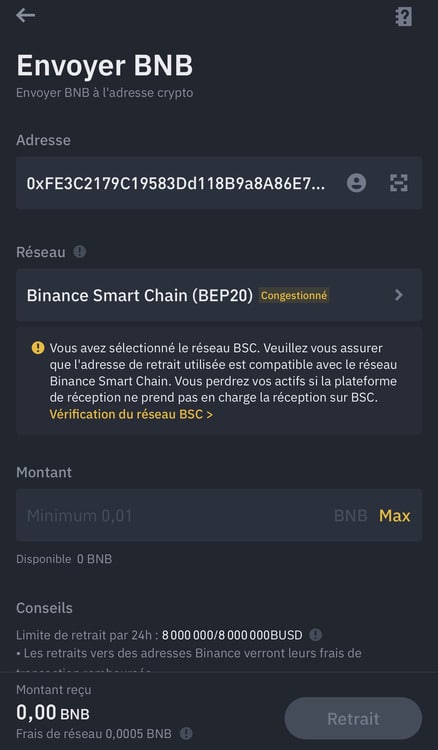
Your tokens should be quickly visible on your Frame wallet if the NBB Chain network is not congested.
Interacting with protocols using Frame
In order to interact with decentralised applications, you will need to install the Frame extension for your browser.
Frame currently offers an extension for Google Chrome, Brave and also for Mozilla Firefox.
You can also download the extension of your choice directly from the Frame desktop application settings:
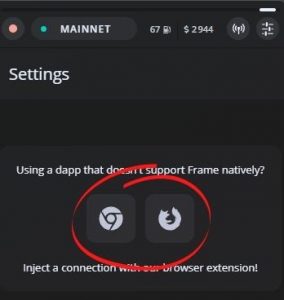
Once this is done, open the extension. The extension requires the desktop application to be open in order to work.
When the connection is successful, you will see “Connected to Frame” displayed.
Let’s go to the Uniswap protocol for example. Click on “Connect Wallet” in the top bar of the site and choose “Injected” from the list.
Note: “Injected” will only be displayed if you have unlocked the address of your choice from Frame.
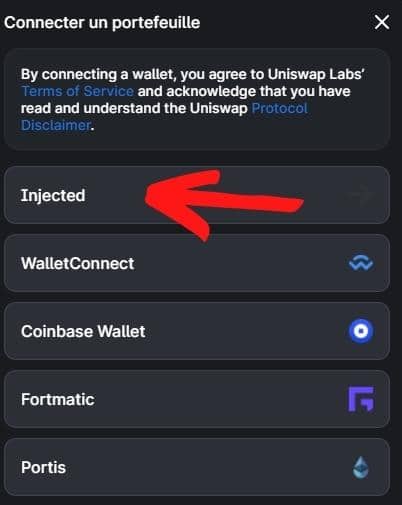
Next, return to the Frame desktop application and give your approval to connect to Uniswap.
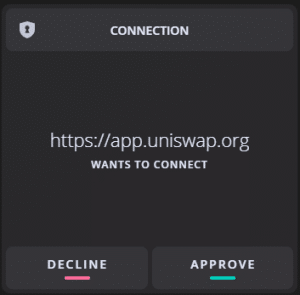
You will now be connected to Uniswap with the corresponding address from your Frame wallet, which will allow you to use swapping or to conduct governance votes with UNI tokens.
Note that Frame will not be available with all the protocols you can find, but it has the ability to masquerade as MetaMask, and thus becomes compatible with a much wider range of protocols.
Let’s go for example to Compound, a protocol that does not yet offer Frame.
Once on the site, you will have to open the browser extension and click on “Appear as MetaMask instead” :
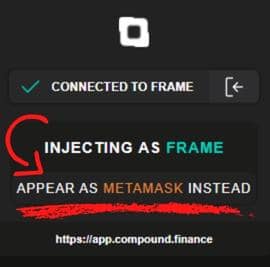
Your browser page should automatically refresh, if not press F5 to refresh manually.
Click on “Connect Wallet” on the Compound page, then select “MetaMask” and then simply validate the connection from Frame as we did earlier.
You are now connected to Compound with Frame, although the protocol was not initially compatible with it. The procedure will always be the same, regardless of the protocol you wish to use.
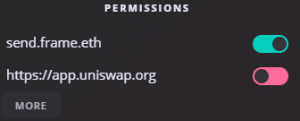
Note that if you wish to withdraw an authorisation, this is possible directly from the application.
Click on the address concerned and simply activate or deactivate the permissions granted in the past.
Our review of the Frame wallet
With a very large number of options and its growing native compatibility, Frame could well become the main competitor of MetaMask. Indeed, the ability to remove permissions directly from the application or to sort networks by family are very useful features. Its compatibility with hardware wallets is also a very good thing that will delight many.
However, the interface may be a little disconcerting at first, especially for novices who may be quickly discouraged from using it, not to mention the fact that Frame is not yet available in French.
In conclusion, Frame has nothing to envy the competitors in its sector and it is likely to continue to gain ground. All you have to do is make up your mind by trying it out!
That’s it for this little tutorial and review of the Frame wallet, which although still in beta phase, is already promising because of the many possibilities it offers.
Feel free to check out our other guides to learn more about the world of cryptocurrencies and blockchain.
