
In this tutorial we will see how to install and configure the Ronin Wallet, dedicated to the Ronin sidechain and more specifically to the Axie Infinity blockchain game. This wallet also allows you to buy, swap and bridge different tokens.
Introduction to the Ronin sidechain (RON)
The Ronin Wallet has been specifically created to be used with the Axie Infinity blockchain game, but it also allows access to other decentralised applications (Dapps) in the Ronin network.
Axie Infinity is a game created by Vietnamese game developer Sky Mavis, where you can collect “Axies”, creatures that can be traded as non-fungible tokens (NFTs).
The game is based on the Ethereum blockchain (ETH), but the Ronin Wallet runs on the Ronin sidechain, in order to have optimal transaction speed and the lowest possible fees.
The Ronin sidechain has its own governance token, the RON, which can be staked to allow validators to finalise blocks. Validators will be paid for each RON issued until there are one billion RONs in circulation on the network.
The RON is also used to pay the fees for the various transactions carried out on the Ronin network.
In addition to the possibility of exchanging NFTs and possibly increasing their value, the game also rewards its players with Smooth Love Potion (SLP) tokens, which can be exchanged on classic platforms such as Binance.
Players with Axies or Lands in their Ronin Wallet also have access to more free trades per day.
Thanks to the Ronin sidechain bridge “Katana”, you can also transfer tokens to the Ethereum blockchain.
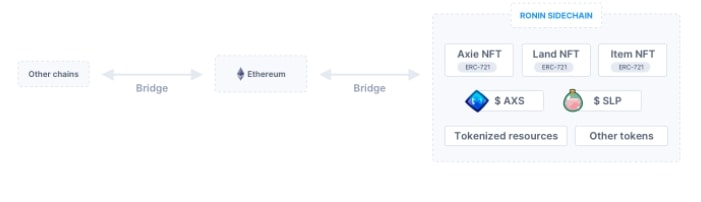
Bridge between Ethereum and the Ronin sidechain
Currently, the Ronin Wallet can store the following ERC-20 tokens: wETH, AXS, SLP and USDC.
It can also store the game-specific ERC-721 (NFT standard on Ethereum) tokens Axies, Land Plots, and Land Items.
Install and configure the Ronin Wallet to use Axie Infinity
Download and configure Ronin Wallet
The Ronin Wallet is available as a browser extension and also as a mobile application.
The extension is currently supported on Google Chrome, Microsot Edge and Mozilla Firefox browsers. Go to this address to download it.
You can also download it from the App Store for the iPhone version, or from Google Play for the Android version.
For this tutorial, we will use the browser extension.
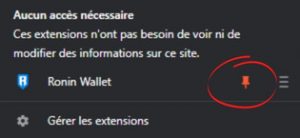
Once you have downloaded the extension, feel free to pin it to your toolbar so that it is always easily accessible.
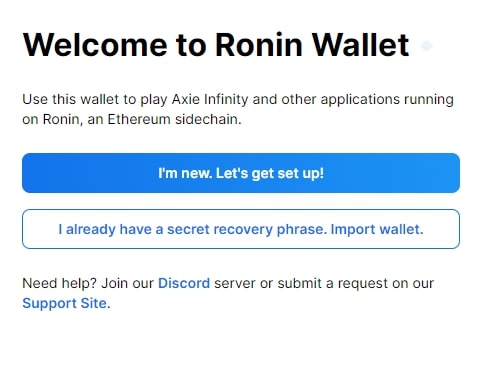
First, we will need to create a new portfolio.
To do this, click on “I’m new. Let’s get set up!”
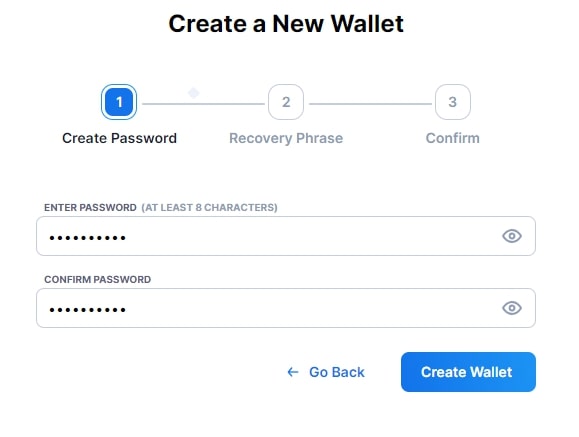
Choose a secure password. Use symbols, numbers and try to alternate between lower and upper case for maximum security.
Next, your “Seed Phrase” will be displayed. This is a series of 12 words that must be kept in a safe place, it will be used to create a new wallet or to move your wallets to a new location. Ronin does not have access to this phrase and will not be able to give it back to you if you misplace it.
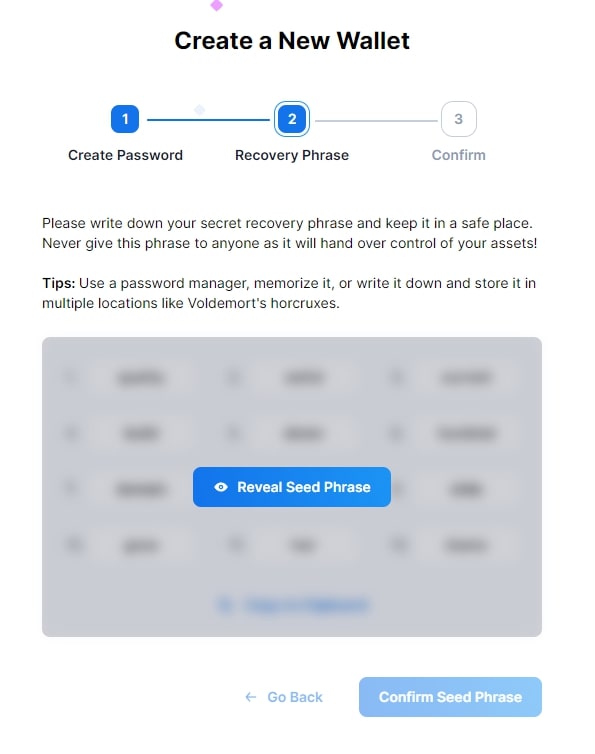
Rewrite the words in your seed sentence in order to complete the operation.
Your Ronin Wallet is now operational.
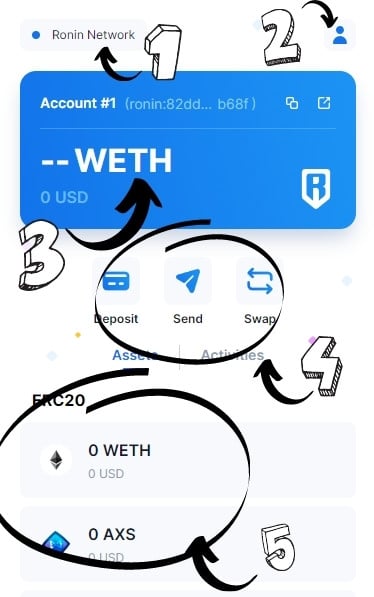
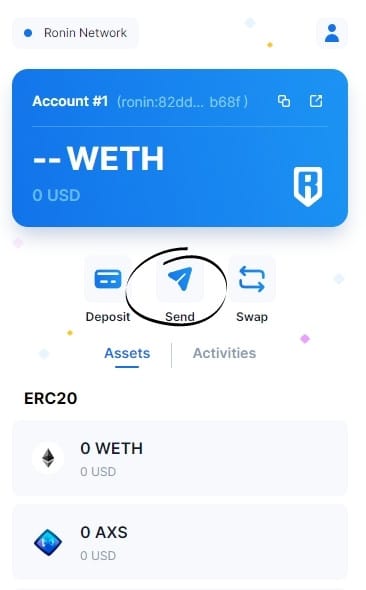
Let’s take a quick look at the home screen of the extension:
- “Ronin Network”. This means you are currently on the Ronin Network;
- User Information. This is where you can add new wallets, manage your settings, connect a hardware wallet (Ledger, Trezor, etc.) and lock the wallet;
- In this window, you will find your wallet address starting with “ronin:” and your balance in wETH;
Here you will find your balance of ERC-20 and ERC-721 tokens.
Sign up for Axie Infinity with Ronin Wallet
First, we will have to go to the Axie Infinity marketplace.
Click on “Login” at the top right of the page and then on “Login with Ronin Wallet”
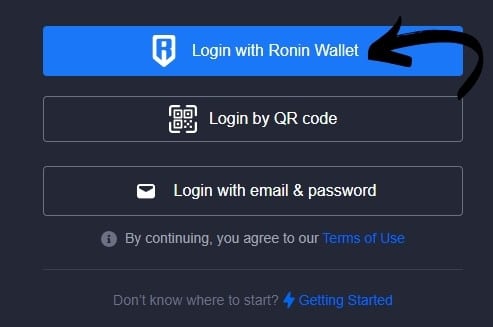
A window will open in your Ronin Wallet. Click on “Confirm” to link it to Axie Infinity.
Then choose a nickname and click on “Save”.
To finalize the creation of your account, click on “Set up email & password” and fill in the required fields.
How to buy wETH tokens and send them to Ronin Wallet
The Ronin sidechain uses wETH (wrapped Ethereum) tokens to pay for its transaction fees.
The wETH are ETH tokens “transformed” into ERC-20 standard tokens so that they can circulate freely on the network.
We will therefore need to first buy Ether from an exchange platform to transform them into wETH. We will also need a MetaMask wallet to do this.
In this tutorial we will use the Binance platform.
If you are not registered on the platform or are not very familiar with its operation and possibilities, we advise you to start by reading our dedicated tutorial
To support us, you can use the link below to sign up to the Binance platform. You will also receive a welcome offer.
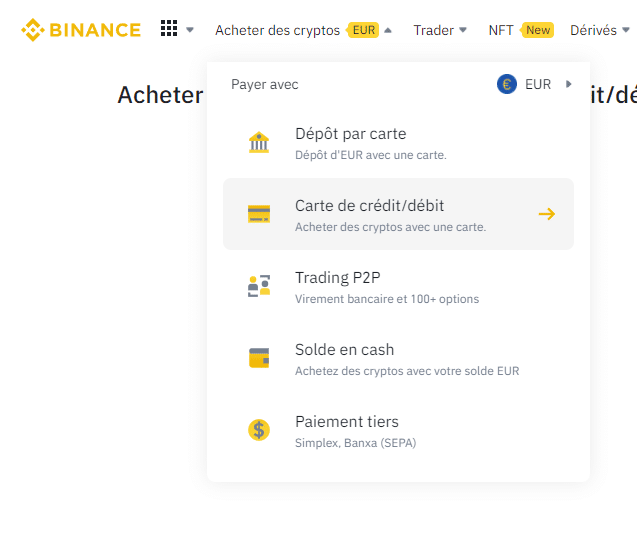
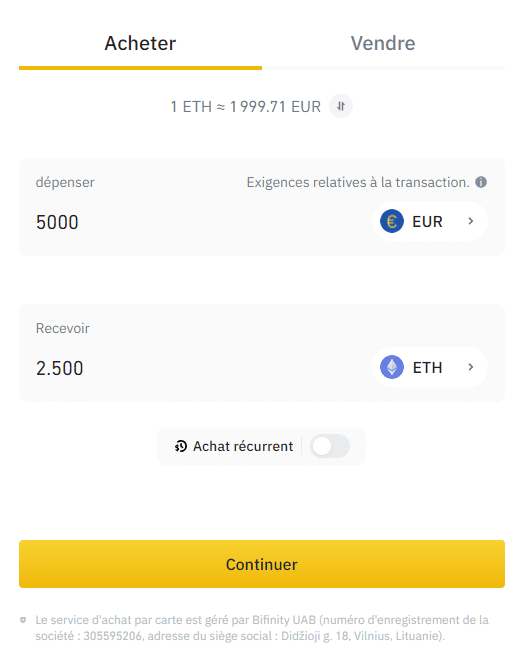
Once you have logged into Binance, go to the top tab “Buy Cryptos”. Then choose the payment method that suits you. Here, we will use a credit card.
Then select the amount of ETH you wish to purchase and click “Continue”.
Wait a few moments for the ETH to arrive in your Binance account, then go to the “Portfolio” tab. Then choose ‘Spot Portfolio’ from the drop down menu.
In the ‘Search for an asset’ column, type in ‘ETH’.
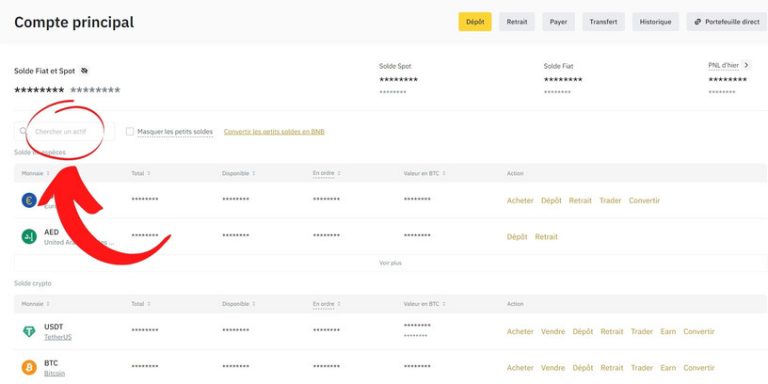
In the “Ethereum” line, click on “Withdrawal”.
![]()
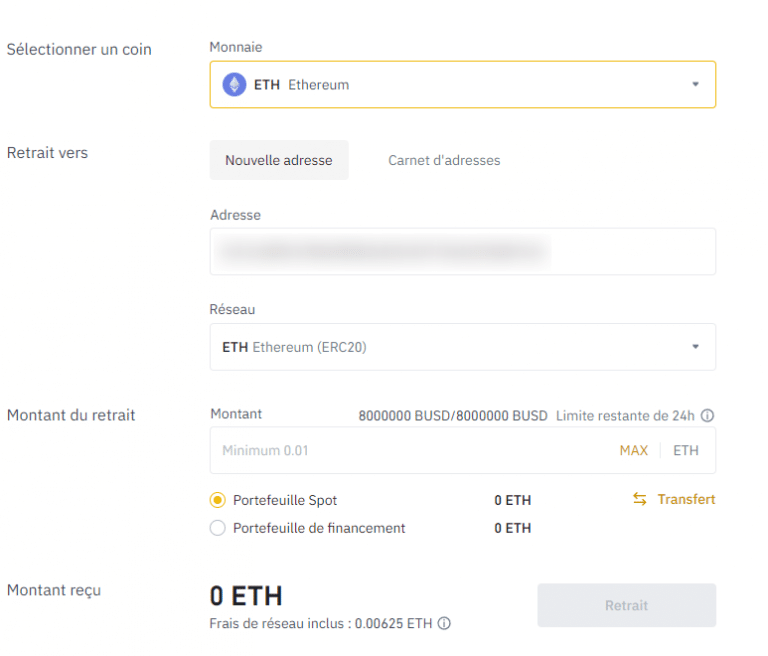
In the new window, make sure that the selected cryptocurrency is ETH. You will then have to enter your MetaMask address in the dedicated field.
Choose the network “Ethereum (ERC20)” then indicate the amount you want to withdraw and finally click on “Withdraw”.
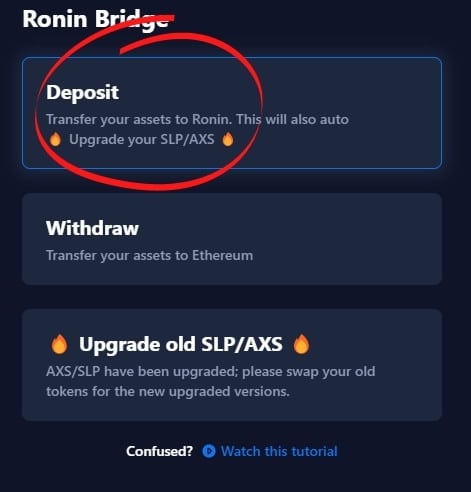
Once on the Ronin network bridge, click on “Deposit”.
A pop-up window will open in your MetaMask extension, click on “Next” then validate.
Copy your address from your Ronin Wallet by clicking on it and copy it into the “Ronin Address” field.
In the “Asset” field, select “ETH”. Choose the desired amount and confirm by clicking on “Next”. Please note that ETH fees will apply to the transaction
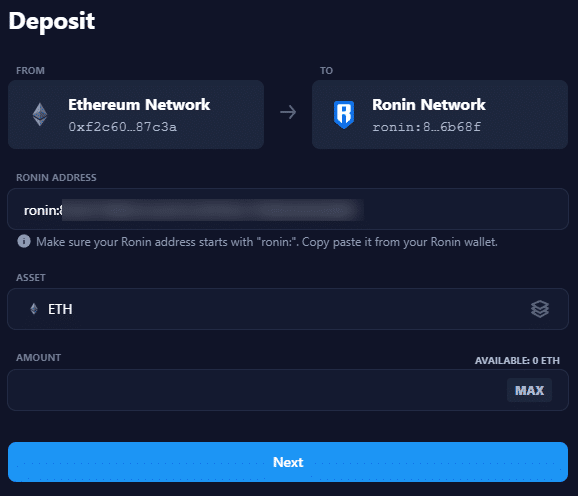
Please wait a few minutes for the ETH to arrive in your Ronin wallet
Perform a transaction from the Ronin Wallet
To transfer tokens to another wallet, click “Send” on the Ronin Wallet homepage.
Enter the address of the Ronin Wallet you wish to transfer the funds to, then choose the token you wish to send and its quantity, then click “Next”.
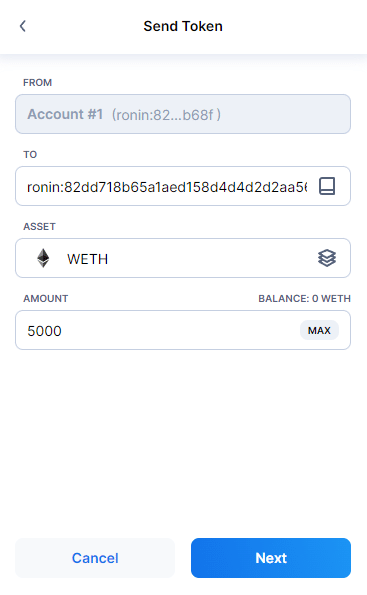
Check that the information is correct and complete the transaction.
Note that Ronin offers up to 100 free transactions per day, so take advantage of this!
That’s it for this tutorial to help you get to grips with the Ronin Wallet, which we hope you’ll find useful.